> ## Documentation Index
> Fetch the complete documentation index at: https://docs-v2-staging.qbraid.com/llms.txt
> Use this file to discover all available pages before exploring further.
> ## Agent Instructions
> Prefer the qBraid CLI for programmatic platform actions: pip install 'qbraid-cli>=0.12', then run `qbraid configure` once with an API key from https://account.qbraid.com/account/api-keys.
> When writing Python, prefer the qBraid SDK: `from qbraid.runtime import QbraidProvider` wraps devices, job submission (`device.run()`), and batch groups (`GroupJobSession`).
> Always install the latest packages (pip install -U qbraid qbraid-cli); do not pin versions from memory. qbraid-cli below 0.12.0 is incompatible with the current API.
> Device IDs use the QRN format vendor:provider:type:name (e.g. qbraid:qbraid:sim:qir-sv, rigetti:rigetti:qpu:cepheus-1-108q). Legacy underscore IDs are deprecated.
> The REST API base URL is https://api-v2.qbraid.com/api/v1, authenticated with an X-API-Key header.
> For endpoints without a dedicated wrapper, use `QbraidSessionV1` from `qbraid_core` — an authenticated session (`.get()`/`.post()`) that sets the X-API-Key header. Full spec: https://docs.qbraid.com/openapi-v2.json
> Free simulators cost no credits; QPU and GPU jobs consume credits. Surface the estimated cost to the user before submitting a paid job.
> For account signup, API keys, credits, and end-to-end action recipes, see https://qbraid.com/llms.txt.
# Dashboard and instances
> Launch qBraid Lab, manage running and stopped instances, and download your files.
## Launch Lab
1. Open the [Dashboard](https://account.qbraid.com/dashboard).
2. Select the workspace that should own the session and pay for its usage.
3. In **Launch qBraid Lab**, choose an available compute profile.
4. Review the profile's resources and pricing, then select **Launch**.
5. Follow the launch progress and open Lab when the instance is ready.
Use **Browse All Instances** for the full compute selection. The dashboard also shows quantum job summaries, quick actions, and **Usage Overview**.
Subscription CPU compute draws from your compute-hours allowance. On-demand instances use wallet credits and can charge for storage while stopped. See [Usage](https://docs-v2-staging.qbraid.com/v2/account/usage) before choosing a profile.
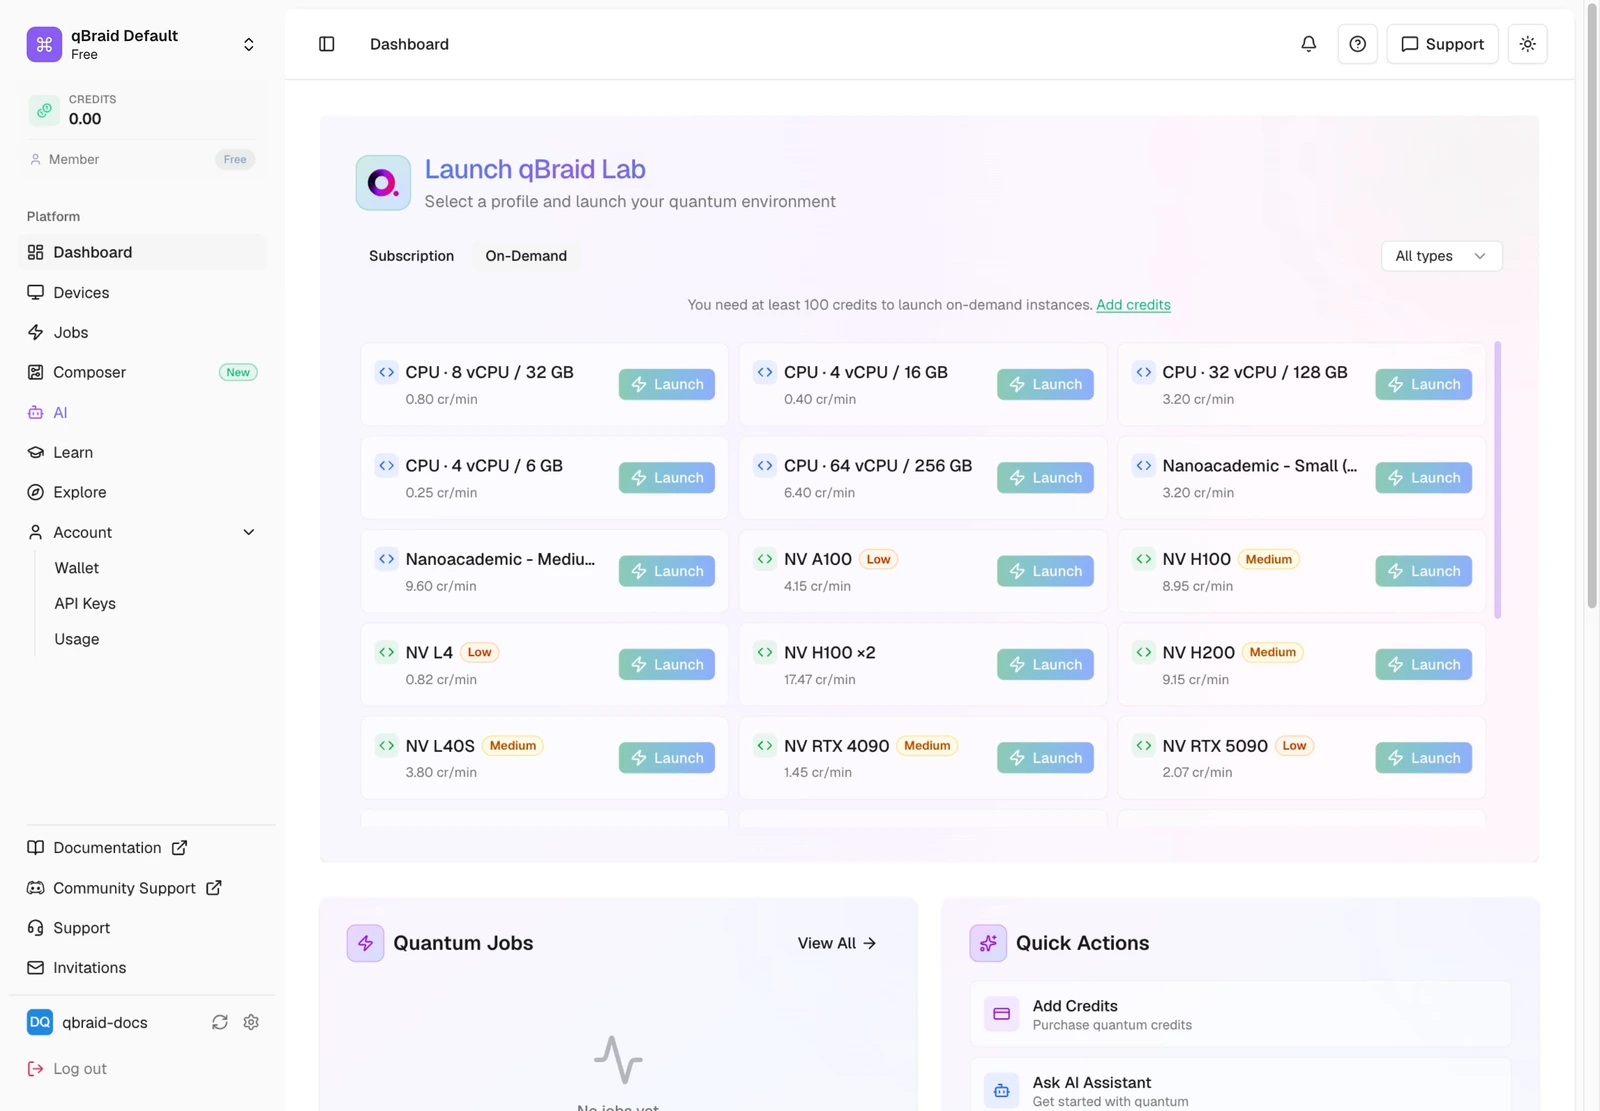 Review the on-demand profile's credit rate and the wallet balance required before launch.
## Manage an instance
Open **My Instances** or select an instance to inspect its details. Available actions depend on the instance's type and status. A running instance can provide Lab, VS Code, and a terminal. Instance details also provide SSH access when supported.
If the instance supports stop and resume, select **Stop** to preserve it for later. Start the stopped instance to resume work. Stopping it preserves its disk and can continue to incur storage charges. Some providers support only termination, so check the available actions before relying on stop and resume.
**Terminate** permanently deletes an on-demand instance and its disk data.
Download files you need before you confirm termination.
If instance details fail to load, retry the page before launching another instance. A failed page load does not mean that the instance stopped.
### Rename an instance
For an on-demand instance, select its name where **Click to rename** is available. Enter a label and press **Enter** or select **Save label**. Press **Escape** to cancel. The label helps you distinguish instances. It does not change the compute profile.
### Connect through SSH
SSH access is available for running subscription Lab instances whose image supports SSH. On-demand instance details do not provide this SSH panel.
1. Open the subscription instance details and select **SSH** to show the **SSH access** panel.
2. Paste your SSH **public** key, such as the contents of `~/.ssh/id_ed25519.pub`. Keep the private key on your computer.
3. Select **Install key** and check that it appears in the installed-key list.
4. Install the [qBraid CLI](https://docs-v2-staging.qbraid.com/v2/cli/user-guide/overview) on your computer if needed.
5. Copy and run the command under **Write your SSH config** on your computer.
6. Copy and run the displayed `ssh` command to connect. You can also use the configured host with VS Code Remote-SSH or `scp`.
If you do not have an SSH key, the panel shows `ssh-keygen -t ed25519` as a way to create one locally. Use the panel's remove control to remove an installed key from that instance when it is no longer needed.
For a subscription instance whose image does not support SSH, choose a subscription profile with an SSH-capable image. If the key list fails to load, select **Retry**. A failed load does not mean that no keys are installed.
## Download Lab files
You can retrieve your Lab files without starting a Lab session.
1. Open the [Dashboard](https://account.qbraid.com/dashboard).
2. Find **Usage Overview**.
3. Select **Download Files**.
Review the on-demand profile's credit rate and the wallet balance required before launch.
## Manage an instance
Open **My Instances** or select an instance to inspect its details. Available actions depend on the instance's type and status. A running instance can provide Lab, VS Code, and a terminal. Instance details also provide SSH access when supported.
If the instance supports stop and resume, select **Stop** to preserve it for later. Start the stopped instance to resume work. Stopping it preserves its disk and can continue to incur storage charges. Some providers support only termination, so check the available actions before relying on stop and resume.
**Terminate** permanently deletes an on-demand instance and its disk data.
Download files you need before you confirm termination.
If instance details fail to load, retry the page before launching another instance. A failed page load does not mean that the instance stopped.
### Rename an instance
For an on-demand instance, select its name where **Click to rename** is available. Enter a label and press **Enter** or select **Save label**. Press **Escape** to cancel. The label helps you distinguish instances. It does not change the compute profile.
### Connect through SSH
SSH access is available for running subscription Lab instances whose image supports SSH. On-demand instance details do not provide this SSH panel.
1. Open the subscription instance details and select **SSH** to show the **SSH access** panel.
2. Paste your SSH **public** key, such as the contents of `~/.ssh/id_ed25519.pub`. Keep the private key on your computer.
3. Select **Install key** and check that it appears in the installed-key list.
4. Install the [qBraid CLI](https://docs-v2-staging.qbraid.com/v2/cli/user-guide/overview) on your computer if needed.
5. Copy and run the command under **Write your SSH config** on your computer.
6. Copy and run the displayed `ssh` command to connect. You can also use the configured host with VS Code Remote-SSH or `scp`.
If you do not have an SSH key, the panel shows `ssh-keygen -t ed25519` as a way to create one locally. Use the panel's remove control to remove an installed key from that instance when it is no longer needed.
For a subscription instance whose image does not support SSH, choose a subscription profile with an SSH-capable image. If the key list fails to load, select **Retry**. A failed load does not mean that no keys are installed.
## Download Lab files
You can retrieve your Lab files without starting a Lab session.
1. Open the [Dashboard](https://account.qbraid.com/dashboard).
2. Find **Usage Overview**.
3. Select **Download Files**.
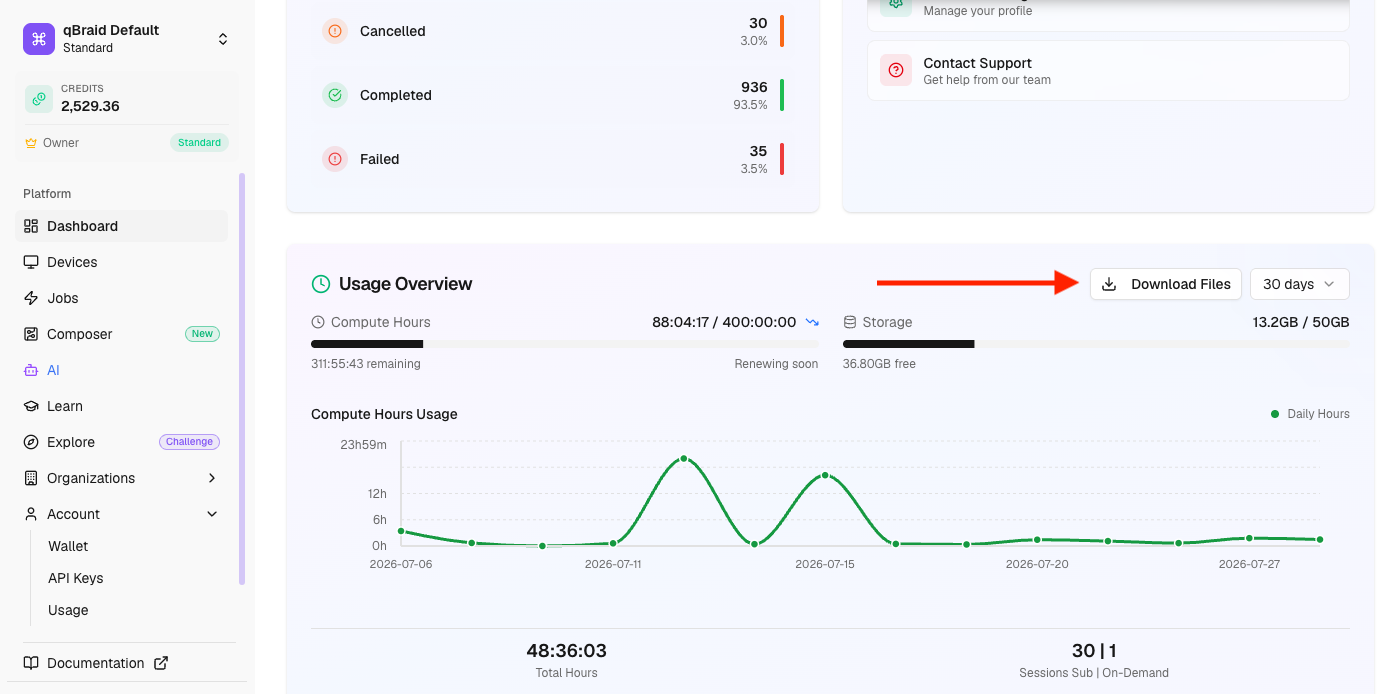 This download is useful when your subscription compute quota is exhausted. It does not replace a backup of an on-demand instance before termination.
## Custom compute profiles
Open [Compute Profiles](https://account.qbraid.com/dashboard/compute-profiles) and select **New Profile**. Enter a base Docker image, then choose an IDE and optional features. Advanced controls let you set resource requests and limits.
Choose the mode that fits your workflow:
- **Quick Start (Try)** applies the environment overlay at startup. The profile is ready to launch after creation.
- **Saved Build (Save)** starts an image build. Wait for the build to finish before launching it.
**My Profiles** shows your personal profiles. Organization administrators also have an **Organization** tab for shared profiles. Review each profile's resources, availability, and rate before launch. Deleting a profile requires confirmation.
This download is useful when your subscription compute quota is exhausted. It does not replace a backup of an on-demand instance before termination.
## Custom compute profiles
Open [Compute Profiles](https://account.qbraid.com/dashboard/compute-profiles) and select **New Profile**. Enter a base Docker image, then choose an IDE and optional features. Advanced controls let you set resource requests and limits.
Choose the mode that fits your workflow:
- **Quick Start (Try)** applies the environment overlay at startup. The profile is ready to launch after creation.
- **Saved Build (Save)** starts an image build. Wait for the build to finish before launching it.
**My Profiles** shows your personal profiles. Organization administrators also have an **Organization** tab for shared profiles. Review each profile's resources, availability, and rate before launch. Deleting a profile requires confirmation.