

Members & Invites
Invite teammates, send them credits with the invite, change roles, and remove people.
The Members page is where admins handle everyone in the organization: active members, pending invites, and anyone who’s been suspended.
Filters at the top let you narrow by name, role, or status (active, pending, suspended).
Roles
Every member has one role. The Owner is set automatically when the organization is created. There’s exactly one owner and that role can’t be reassigned.
| Role | What they can do |
|---|---|
| Admin | Everything. Manage settings, billing, members, invites, credits, seats. |
| Manager | Manage devices, jobs, projects, and members’ resource access. Can view billing. Can’t change settings or assign seats. |
| Member | Use org resources. Can’t manage anyone else, billing, or settings. |
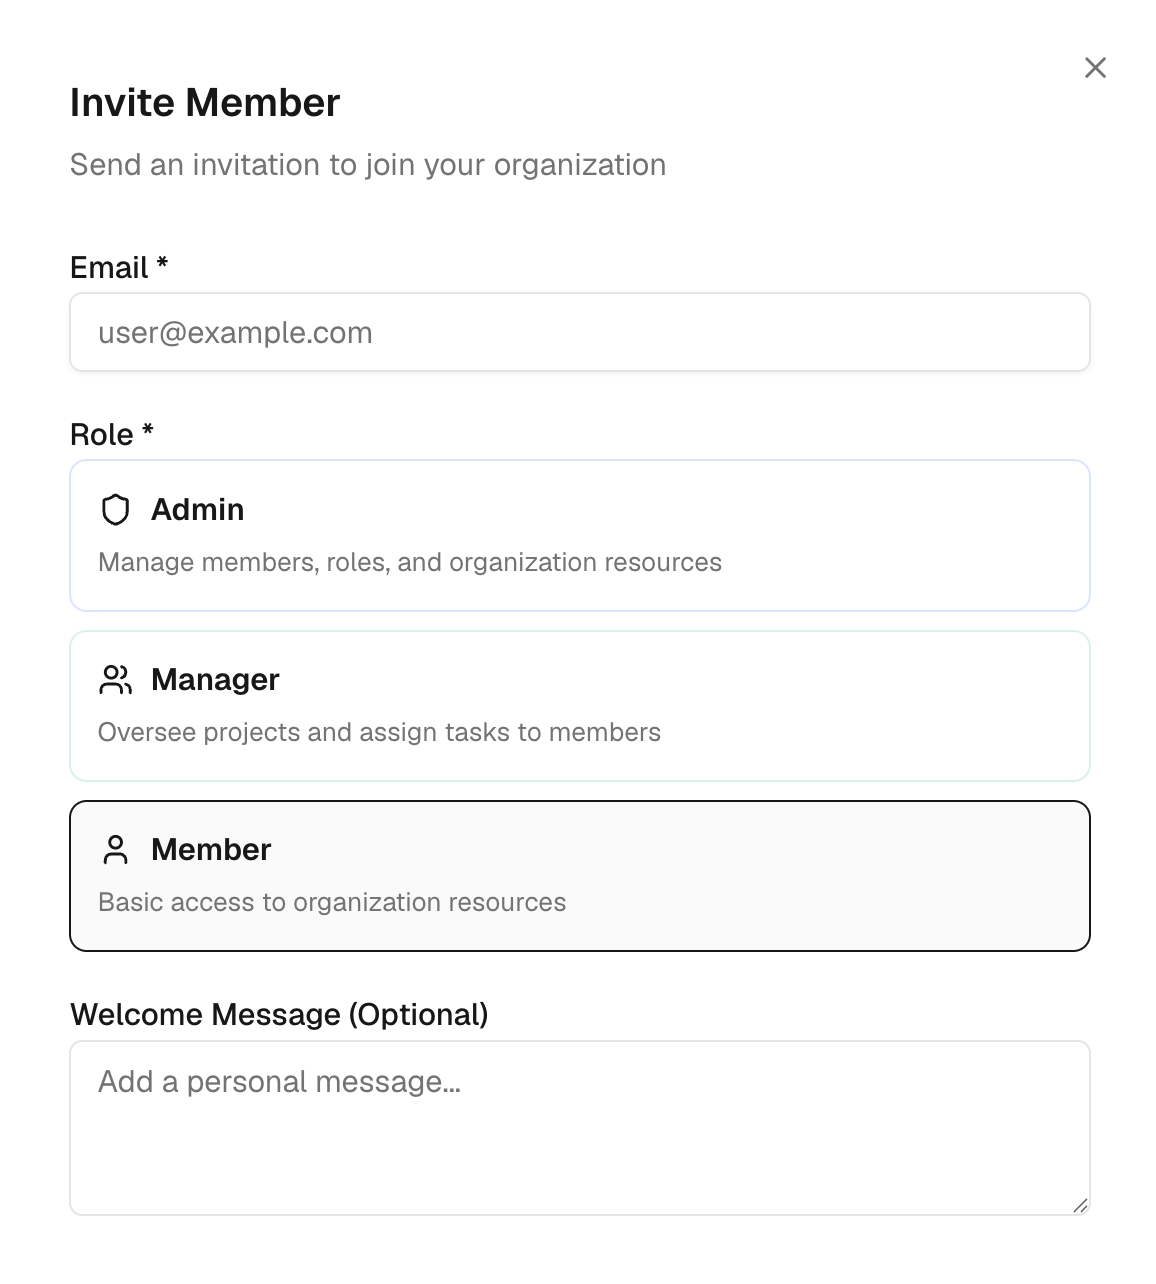
Invite one person
Open the workspace switcher in the top-left of the dashboard and select your organization.
The button is in the top-right of the Members page.
The invitee doesn’t need a qBraid account yet. If they don’t have one, they’ll create it when they accept.
Choose Admin, Manager, or Member. See Roles above.
Credits move from the org wallet to the new member’s wallet when they accept. The org balance updates live as you type.
A short personal note included in the invite email.
Click Send Invite. The invitee appears in the Members list with status
pending until they accept.
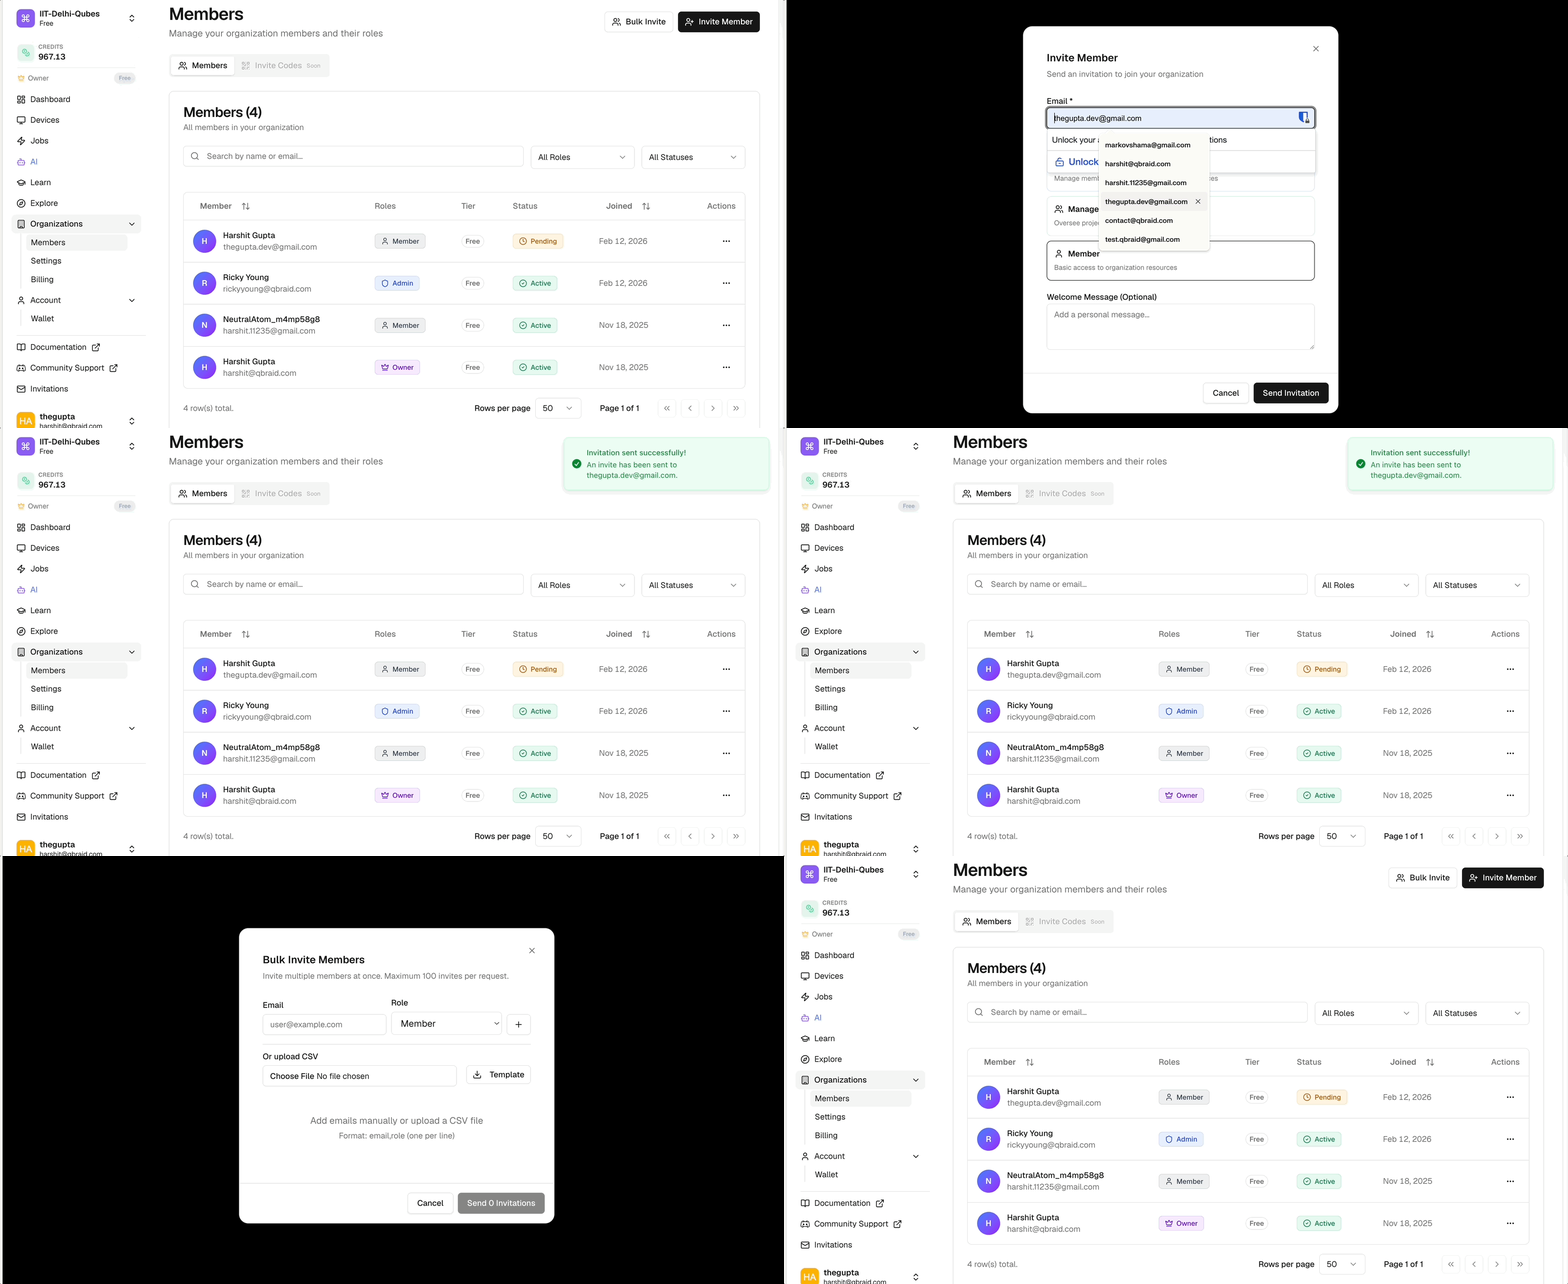
If you put credits on the invite and the user never accepts (or you cancel it), the credits stay in the org pool. Credits only actually move when the invite is accepted.
Invite many at once
Open the workspace switcher and select your organization.
The button is next to Invite Member in the top-right.
Either type them in manually or upload a CSV (see tabs below).
Click Send Invitations. You get per-row results so you know exactly which invites went out and which had problems.
Type Email, Role, and (optionally) Credits, then click Add to Queue. Repeat for each invite.
Drop in a file that looks like this:
email,role,credits
alice@example.com,member,500
bob@example.com,admin,
carol@example.com,member,1000
The credits column is optional. Rows with bad emails or unknown roles get flagged before anything sends.
Bulk invites are capped at 100 users per upload. The total credits across all rows can’t exceed your org’s wallet balance.
Manage existing members
Every action below starts the same way: open Members, find the row, and click the actions menu (⋯). Then pick the action:
Click Resend Invitation. A new invite email is sent. Only available on pending rows.
Click Cancel Invitation and confirm. The user can no longer accept; any attached credits stay in the org pool. Only available on pending rows.
Click Suspend Member and confirm. Status flips to suspended and they lose access to org compute, jobs, and credits immediately.
Click Activate Member and confirm. Their previous role and credit balance come back exactly as they were.
Click Remove Member and confirm. When you remove someone:
- They lose access to all org resources right away.
- Their seat (if they had one) goes back to the org pool. You can reassign it.
- Credits the org gave them return to the org wallet.
Removal can’t be undone. If they need access again, you’ll have to send a fresh invite.
Click Edit Role, pick Admin, Manager, or Member, and confirm. The change takes effect immediately. If they’re already signed in somewhere, they’ll see the new permissions next time they load a page.
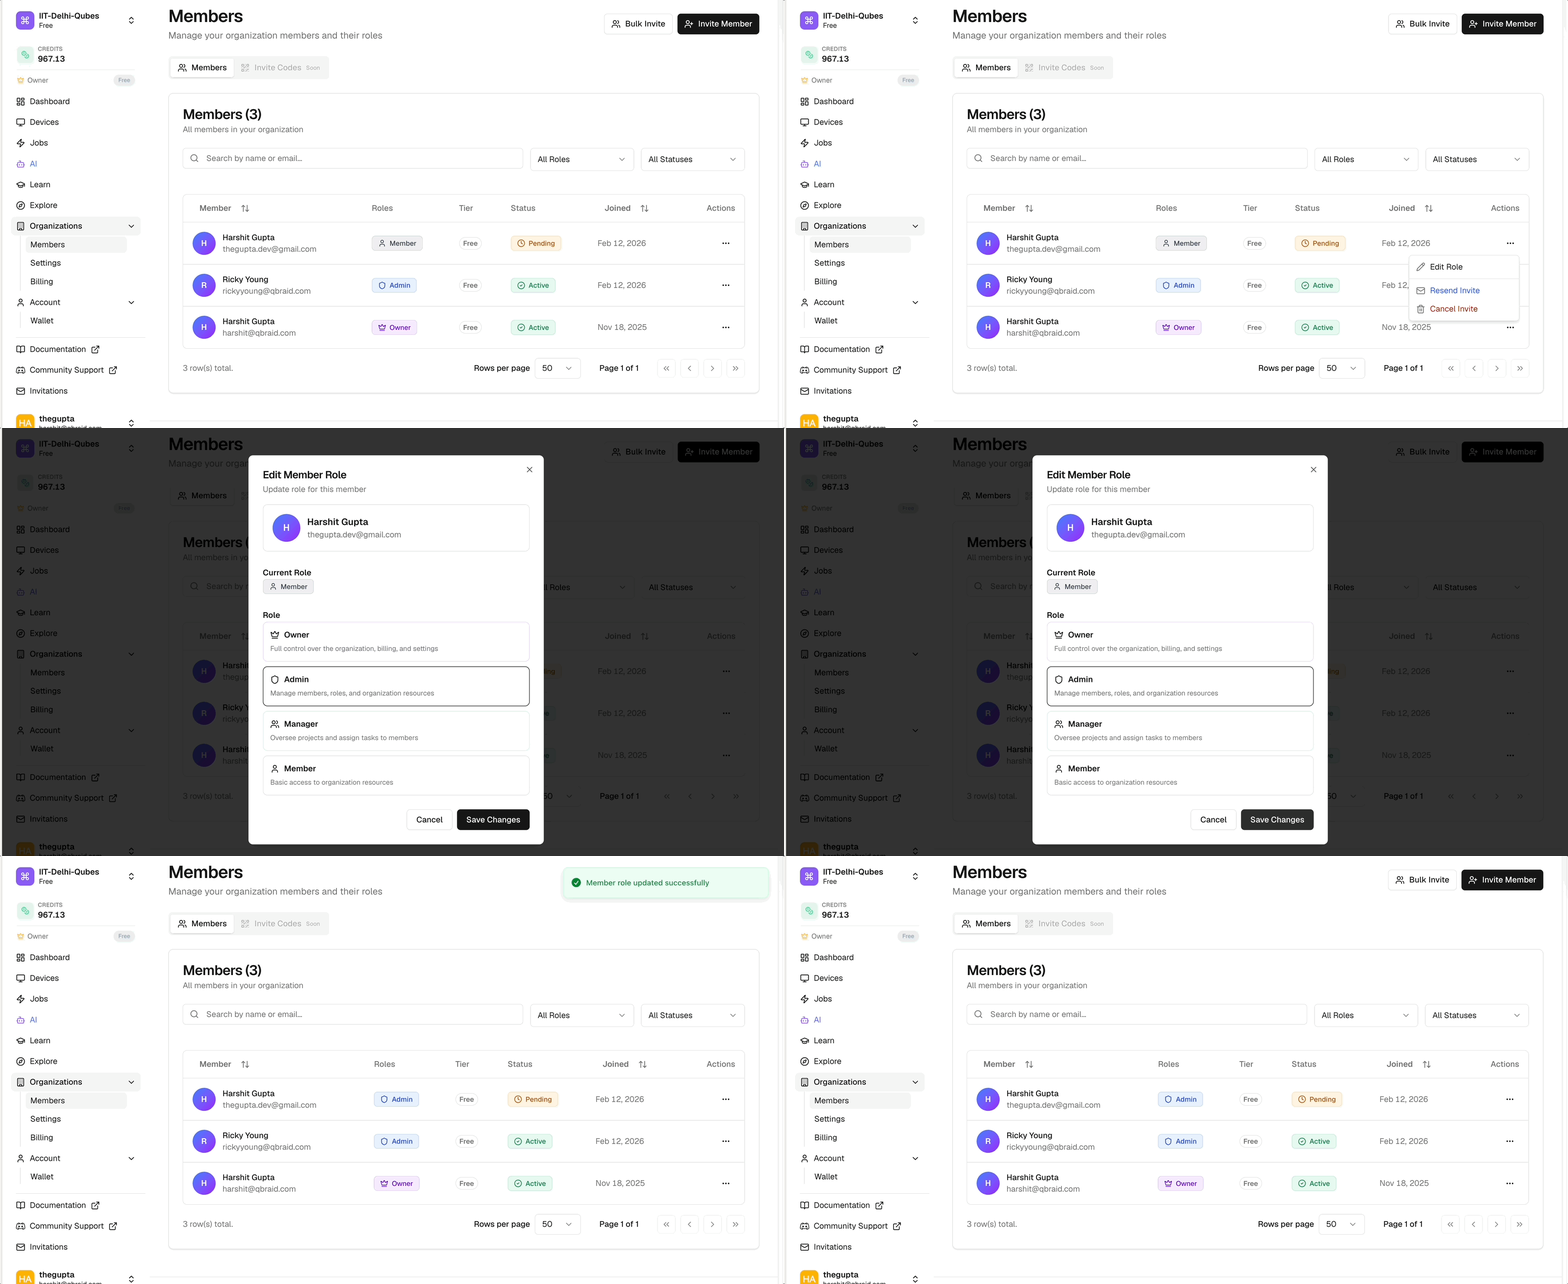
The Remove Member action does two different things depending on status. On
a pending row it cancels the invite. On an active or suspended row it
removes the member.
Thanks for your feedback.